









Start with the waste pipe, the space below the tray and the level at the shower entry. A point drain is a practical choice when its outlet lines up with a usable pipe route. A short-end linear channel makes sense when the layout calls for the fall to run towards one end and there is room for the channel, fitting and pipe. Both can meet the bathroom floor at a flush entry. In the two Funtek layouts below, the linear option needs 15 mm more recess at the fitting.
Compare Both Layouts on the Same 1,200 × 800 mm Tray
These two Funtek reference layouts have the same outside dimensions, the same wall orientation and the same open short end at the entry. Water runs to an offset opening on the point-drain tray. On the linear tray, it runs towards a channel at the opposite short end from the entry, then leaves through one concealed waste.


Swipe sideways on a phone to compare and tap a photo to enlarge it.
| What to compare | Point drain | Short-end linear drain |
|---|---|---|
| Cover examples |  |
 |
| Tray footprint and entry | 1,200 × 800 mm, flush entry in the section shown | 1,200 × 800 mm, flush entry in the section shown |
| Where water enters | Ø90 mm tray opening beneath the point cover | 660 × 120 mm integral channel leading to a concealed Ø52 mm opening |
| Centre of the opening below the cover | 400 mm from the drain-end tray edge and 400 mm from the back edge | 140 mm from the drain-end tray edge and 400 mm from the back edge |
| Planning recess at the fitting | 110 mm below the finished entry level | 125 mm below the finished entry level, at the channel |
Dimensions apply to the two layouts shown in the Funtek drawing set. Check the approved drawing for the tray and waste fitting on your order.
Download the 1,200 × 800 mm Drainage Comparison
Check the Waste Pipe Position Before Choosing the Cover
Mark the wall lines, tray edges and existing pipe connection on one plan. For a point drain, give the centre of the opening from two tray edges and mark the direction the outlet elbow needs to face. For a linear drain, show the length and width of the channel, its distance from the wall and the centre of the concealed waste separately. On the drawings above, moving from the point opening to the linear waste moves the opening centre 260 mm closer to the drain-end edge. Both fittings discharge sideways in the illustrated configuration. The elbow and pipe route still need to be checked on the plan and section.
In a retrofit, put the existing pipe and any fixed obstructions on the same drawing before choosing. If only one opening can connect to the existing waste within the available space, shortlist that layout first. Where both fit, compare the floor fall and the entry detail.


Compare the Fall, Threshold and Space Below the Tray
In the point-drain plan, fall arrows approach the opening from several directions. In the short-end channel plan, they run along the tray towards the drain end. Both sections show a 0 mm step at the entry, with recess depths measured down from the same finished floor level.


The point section reserves 110 mm at the fitting, with 30 mm of tray and 80 mm underneath. The linear section reserves 125 mm, allowing for the same 30 mm at the tray edge, a 15 mm channel projection and another 80 mm below it for the fitting. The downstream pipe may need more depth as it falls towards the branch. Check the outside dimensions of the elbow, union and pipe along that route.
Suppose the site has 115 mm at each proposed fitting position. Measured from the same finished entry level, the point-drain reference leaves 5 mm against the drawing’s allowance and the linear reference is 10 mm short. The point layout is worth checking first. Ask the installer to confirm whether the pipe and fittings also fit along the entire run.


Choose the Grate and Confirm What Comes with the Tray
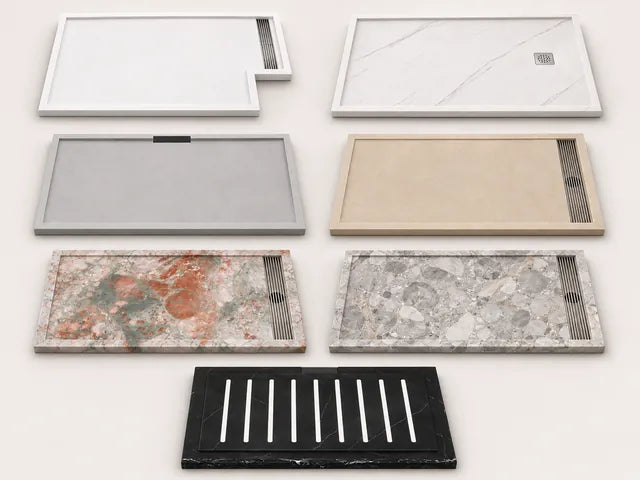
A compact point cover, an exposed linear grille and a concealed slot are three visible options. The cover is what you see from above. The waste fitting below it still needs to match the opening, installation height and pipe connection. Ask how the cover lifts out and what access is available for cleaning the trap.


Both reference fittings are listed under the funtek-paisui designation. Identify the point or linear configuration on the order alongside the opening and outlet direction.
- The reference tray includes a removable stainless steel cover. The short-end channel is an integral part of the linear tray shown.
- The reference drain kit contains the drain body with a removable trap, a 45° outlet elbow, a union and seals. Both drawings show side discharge. The specification lists a DN 40/50 connection, and the example drawings show a site Ø40 mm waste pipe.
- The installer supplies the site pipework, including the downstream waste pipe and any couplers or adapters it needs. Check the final kit contents and any alternate fitting on the quotation.
See the sintered stone shower tray collection to compare finishes and visible drain options.
Mark Up Your Drawing Before Requesting a Quote
A sketch is enough to start a conversation. Put these details on the plan and section when the installer is ready to check the layout.
- Finished tray size, walls, entry edge and any cut-outs.
- Drain opening or channel, outlet centre from two edges and outlet direction.
- Fall direction, finished entry level, available recess at the fitting and the pipe route to the branch.
- Preferred cover and a list of the parts you want included in the quotation.


Use the fillable shower tray measuring sheet in the technical guide to record the finished opening, cut-outs, drain coordinates and entry condition. The installer can use the approved tray and fitting drawings to coordinate support, waterproofing and the site waste connection.
Ask About Shower Tray Drain Options
Ask about the available tray finishes, compatible drain parts or prices. If you already have a sketch, send it with your question.